There is a growing trend for unifying user experience across platforms: in early days iOS and Android had their own unique feel, but recently they have been growing closer together in the way applications are designed and interactions happen.
From bottom navigation to split screen feature available in Nougat Android, there is a lot of common between two platforms these days. For designers it means that often we can adjust popular features that were once associated with one platform to apps designed for another one. As for developers, it is a great chance to improve and refine their technical skills.
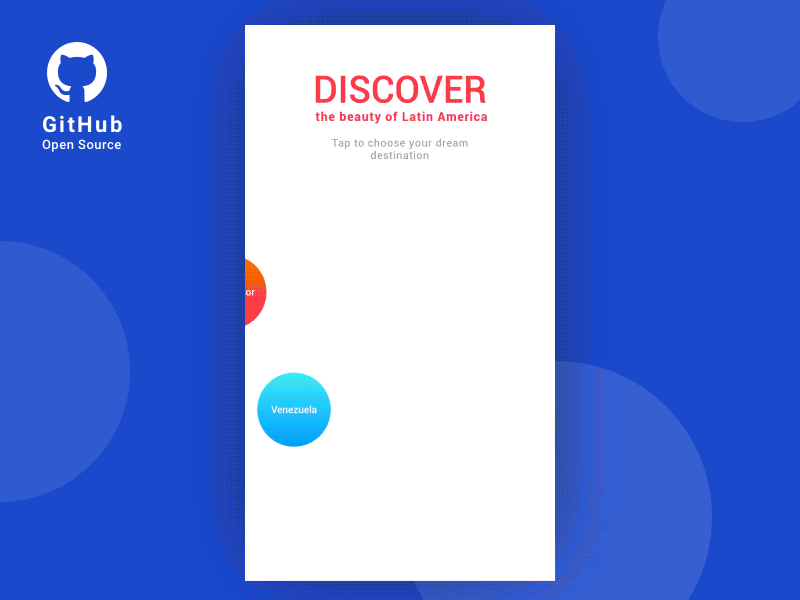
So we decided to create the component with the bubble based interface for Android, drawing our inspiration from selection bubbles in Apple music.
Put design first
Our Bubble Picker is an example of the animation that is equally appealing to different groups of users. Bubbles summarize information into convenient UI elements that are easy to understand and also visually consistent. It makes the interface simple enough for novice users and still feels interesting for experienced ones.
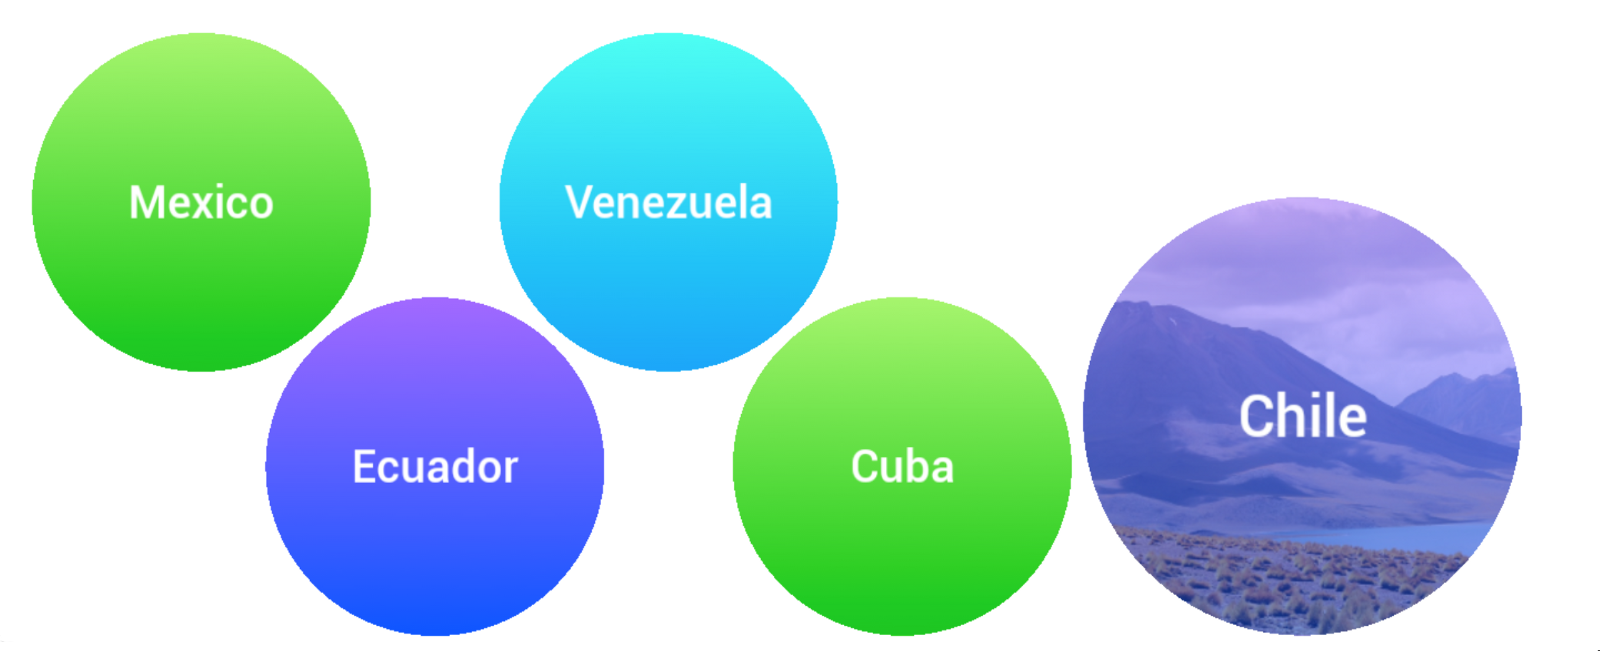
This type of animation is very helpful for apps rich in content, where users have to make a choice from a list of options. For example, in our component we used bubbles to hold names of potential destinations for a travel app. Bubbles float freely, and when a user taps on one of them, the chosen bubble grows in size. It gives users a meaningful feedback on their actions and enhances the sense of direct manipulation.
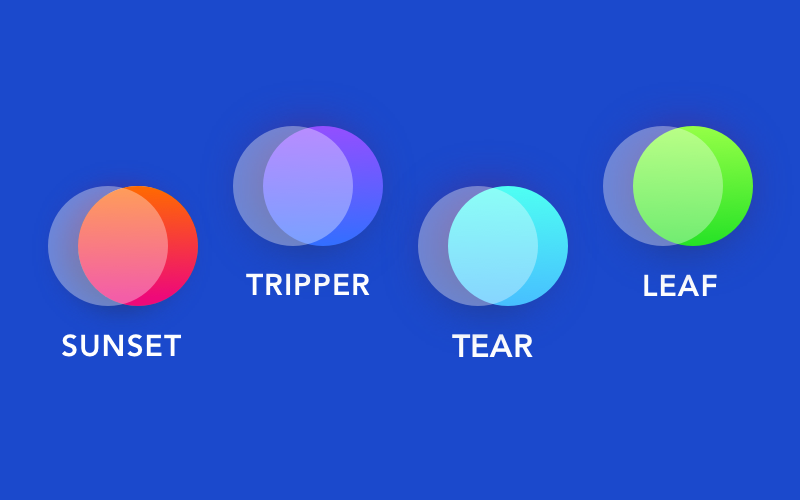
The component is pretty with a white theme, lots of bright colors and photographs throughout. Moreover, I decided to experiment with gradients in order to add more depth and volume. Gradients might be the major visual in the display and might attract the attention of new visitors.
Bubble Picker’s gradients
We provide developers with an opportunity to customize all UI elements, therefore our component will suit any app.
Review developer’s challenges
The first issue I’ve faced when I decided to implement this animation was to choose tools for the development. It was clear for me that rendering of such a fast animation on Canvas wouldn’t be efficient enough, so decided to use OpenGL (Open Graphics Library). It’s a cross-platform application programming interface for 2D and 3D graphics rendering. Fortunately, Android supports some versions of the OpenGL.
I needed to make circles move in a natural way, just like gas bubbles do in a glass of fizzy drink. There are plenty of physics engines available for Android, but I had some requirements for them and this fact made it significantly more difficult to make a choice. My requirements were the following: the engine should be lightweight and easily embeddable in the Android library. Most engines are developed for games and they required adapting the project structure to them. After some research I found JBox2D (Java port of the Box2D engine written in C++), and since our animation isn’t supposed to be used with a great number of physical bodies (e.g 200 or more), it was enough to use a Java port but not the original engine.
Also further in this article I’ll explain my choice of the programming language (Kotlin) and what advantages it has in my opinion. To find out more about the difference between Java and Kotlin review my previous article.
How to create shaders?
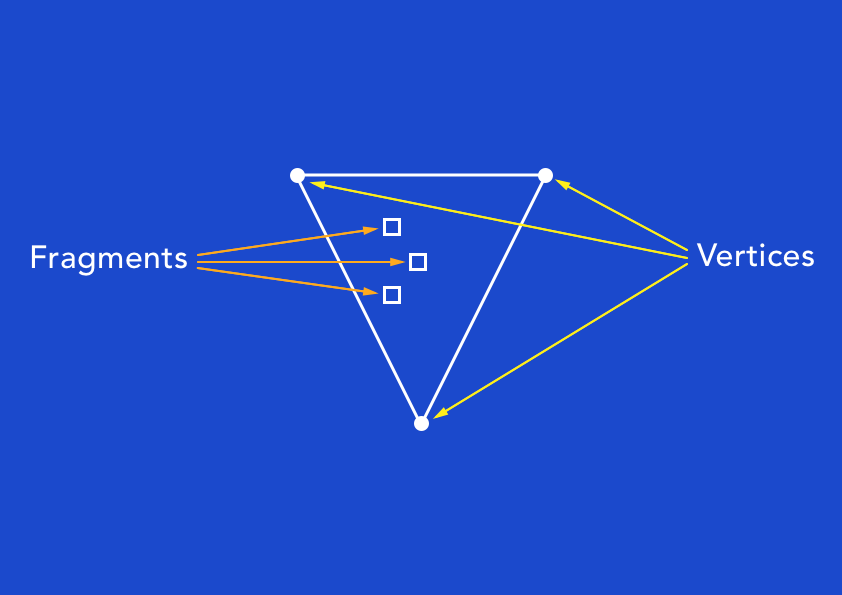
Firstly, it’s important to understand that the building block in OpenGL is a triangle, since it’s the simplest shape that can approximate other shapes. So any shape that you create will consist of 1 or more triangles. To implement our animation I used two combined triangles for every body, so it looks like a square, where I can draw the circle.
To render created shape you need to write at least two shaders — vertex shader and fragment shader. Their difference is described by their names. Vertex shader will be executed for each vertex of each triangle, and fragment shader will be executed for every pixel-sized part of the triangles.
Fragments and vertices of the triangle
Vertex shaders are used to control transformations of the shape (e.g scaling, position, rotation), while fragment shaders are responsible for the color of the sample.
Vertex shader
Fragment shader
Shaders are written in GLSL (OpenGL Shading Language) and are required to be compiled at runtime. If you code in Java the most convenient way is to write your shaders in separate file and retrieve them using input stream. As you see Kotlin lets developers create shaders in classes in easier way. You can put any multiline code in triple quotes """.
In GLSL there are several types of variables:
value of the uniform variableisthe same for all vertices and fragments
attribute variable is different for each vertex
the varying variable is used to pass data from vertex shader to fragment shader and its value will be linearly interpolated for each fragment
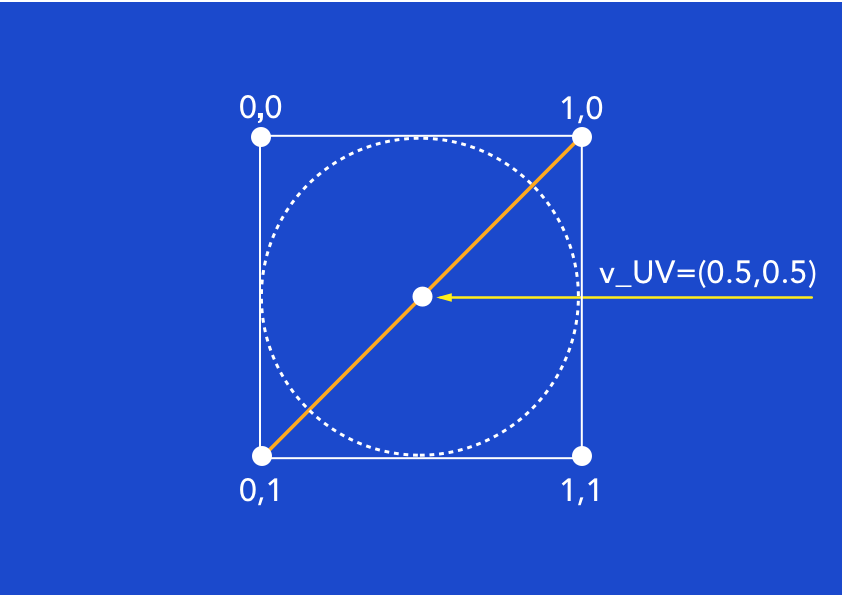
u_Matrix variable contains the translation matrix with x and y, which should be added to the initial position of the circle, and obviously its value should be equal for all vertices of the shape and the type of this variable is uniform, while the position of the vertices will differ, so a_Position variable is attribute. a_UVvariable is needed for two purposes:
To find out the distance between current fragment and the center of the square. Depending on this distance I can change the color of the fragment to draw a circle.
To properly place the texture(the photo and the name of the country) in the center of a shape.
The center of the circle
a_UV contains x and y values which are different for each vertex and lie between 0 and 1. In the vertex shader I just pass the value of the a_UV to v_UV variable, so the second one could be interpolated for every fragment. And as a result the v_UV variable of a fragment in the center of a shape will contain the [0.5, 0.5] value. To find out the distance I used distance() method, which receives two points.
Using smoothstep to draw antialiased circles
Initially my fragment shader looked a bit different:
I changed the fragment color depending on the distance from the center without any antialiasing. And the result was not so impressive — the edges of the circles were notched.
Not antialiased circles
So the smoothstep function was the solution. It smoothly interpolates from 0 to 1 based on distance compared to the start and end point of the transition between the texture and the background. Thus the alpha of the texture on the distance from 0 to 0.49 is 1, on the 0.5 and above it is 0, and between the 0.49 and 0.5 it is interpolated, so the edges of the circles would be antialiased.
Antialiased circles
How to use textures to display the images and text in OpenGL?
Every circle in this animation can have two states — normal and selected. In the normal state the texture of a circle contains text and color, in the selected state it also contains an image. So for every circle I needed to create two different textures.
To create the texture I use a Bitmap instance where I draw all the elements and bind the texture.
And after that I pass the texture unit to the u_Text variable. And to get the actual color of a fragment I use texture2D() method which receives the texture unit and the position of the fragment respective to its vertices.
Using JBox2D to make the bubbles move
The animation is pretty simple when talking about the physics. The main object is a World instance. All the bodies must be created using the world.
As you see it’s easy to create the body: you need to specify the body type (e.g dynamic, static, kinematic), its position, radius, shape, density and fixture.
Every time the surface is drawing, it’s necessary to call step() method of the World instance to move all the bodies. After that you can draw all shapes at their new positions.
The issue I’ve faced is that world can have a gravity only as a direction, but not a point. JBox2D doesn’t support orbital gravity. As a result I couldn’t move the circles to the center of the screen. So I had to implement gravitation by myself.
Engine
Gravitation challenge
So every time the world moves I calculate the appropriate force and apply it to each body and it looks like the circles are affected by gravitation.
Detecting user’s touches in GlSurfaceView
GLSurfaceView like any other Android view can react to user’s touch.
So the GLSurfaceView intercepts all the touches, and its renderer handles all of them.
Renderer
Engine
When a user swipes the screen, I change the gravity center to the position of the user’s touch, so for the users it looks like they control the movements of the bubbles. And when users stop swiping I return the bubbles to their initial state.
Finding the bubble by the coordinates of the user’s touches
When user clicks on the circle, I receive the touch position on the screen in onTouchEvent() method. But I also need to find the clicked circle in the coordinate system of the OpenGL. By default the center of the GLSurfaceView has [0, 0] position, and the x and y values lie between -1 and 1. So I also have to consider the ratio of the screen sides.
Renderer
And when I find the selected circle, I change its radius and texture.
Feel free to use it in your projects!
Our vibrant component is a great way to make an app more content-focused, original and fun.
It is just the first version of the component, but we surely plan to develop it further. We would like to give developers a possibility to customize physical behavior of the bubbles and specify url to add the image to the animation. In addition, we plan to add some new features (e.g removing of bubbles).
Don’t hesitate to send us your experiments, we are curious to see how you use our Bubble Picker. And do let us know if you have any questions or suggestion regarding the animation.
We are going to publish more awesome things soon. Stay tuned!