|
м•Ҳл“ңлЎңмқҙл“ң(Android) CanvasлҘј мқҙмҡ©н•ҙм„ң мқҙлҜём§ҖлҘј мӣҗн•ҳлҠ” мң„м№ҳм—җ к·ёлҰ¬кё°
м•Ҳл“ңлЎңмқҙл“ң(Android)м—җм„ң CanvasлҘј мқҙмҡ©н•ҙ мқҙлҜём§ҖлҘј мӣҗн•ҳлҠ” мң„м№ҳмҷҖ мӣҗн•ҳлҠ” нҒ¬кё°лЎң 축мҶҢ, нҷ•лҢҖн•ҙм„ң м¶ңл Ҙн•ҳлҠ” л°©лІ•мһ…лӢҲлӢӨ.
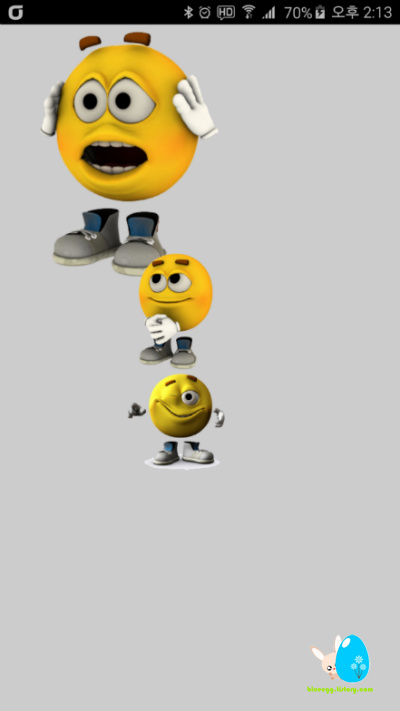
мң„ к·ёлҰјмқҖ м•„лһҳмқҳ мҳҲм ңлҘј мӢӨн–үн•ҙм„ң мәЎмІҳн•ң нҷ”л©ҙмһ…лӢҲлӢӨ.
мқҙлІҲ мҳҲм ңлҠ” XMLмқҖ мӮ¬мҡ©н•ҳм§Җ м•Ҡкі , java л¬ёл§Ң мӮ¬мҡ©н•ҙм„ң мһ‘м„ұн•ң мҳҲмһ…лӢҲлӢӨ.
н…ҢмҠӨнҠё кіјм •мқҙлқјм„ң мқјл¶ҖлҠ” мЈјм„қмІҳлҰ¬н•ҙ л‘җм—ҲмҠөлӢҲлӢӨ.
мўҖ лҚ” мғҒм„ён•ҳкІҢ м„ӨлӘ…н•ҳл©ҙ м•Ҳл“ңлЎңмқҙл“ңм—җм„ң Canvasм—җ к·ёлҰјмқ„ к·ёлҰ¬лҠ”лҚ°, 비нҠёл§ө(Bitmap)мқ„ мқҙмҡ©н•ҙм„ң к·ёлҰјмқ„ л¶Ҳлҹ¬мҷҖ нҷ”л©ҙм—җ к·ёлҰ¬лҠ” л°©мӢқмһ…лӢҲлӢӨ.

мқҙлҜём§ҖлҠ” C:\Android\workspace\AnimationCanvasTest\res\drawable-hdpi м—җ pacman01, pacman02, pacman03 нҢҢмқјмқ„ лҜёлҰ¬ м ҖмһҘн•ҙ л‘җм—Ҳмңјл©°, 3к°ңмқҳ нҢҢмқј лӘЁл‘җ png нҢҢмқјмһ…лӢҲлӢӨ.
|
** AnimationCanvasTest.java нҢҢмқј мҶҢмҠӨ **
package com.example.animationcanvastest;
import android.support.v7.app.ActionBarActivity;
import android.os.*;
import android.view.*;
import android.content.Context;
import android.content.res.Resources;
import android.app.*;
import android.graphics.*;
import android.util.*;
import android.widget.*;
public class AnimationCanvasTest extends Activity {
protected void onCreate(Bundle savedInstanceState) {
super.onCreate(savedInstanceState);
//setContentView(R.layout.activity_animation_canvas_test);
setContentView(new MyView(this));
}
public class MyView extends View {
private Bitmap image1, image2, image3;
public MyView(Context context) {
super(context);
setBackgroundColor(Color.LTGRAY);
Resources r = context.getResources();
image1 = BitmapFactory.decodeResource(r, R.drawable.pacman01);
image2 = BitmapFactory.decodeResource(r, R.drawable.pacman02);
image3 = BitmapFactory.decodeResource(r, R.drawable.pacman03);
}
@Override
protected void onDraw(Canvas canvas) {
canvas.drawBitmap(image1, 0, 0, null);
int w = image2.getWidth();
int h = image2.getHeight();
//Rect src = new Rect(0, 0, w, h);
Rect dst = new Rect(400, 800, 400 + w / 2, 800 + h / 2);
canvas.drawBitmap(image2, null, dst, null);
w = image3.getWidth();
h = image3.getHeight();
//src = new Rect(0, 0, w, h);
dst = new Rect(400, 1200, 400 + w / 2, 1200 + h / 2);
canvas.drawBitmap(image3, null, dst, null);
super.onDraw(canvas);
}
}
/*
@Override
public boolean onCreateOptionsMenu(Menu menu) {
// Inflate the menu; this adds items to the action bar if it is present.
getMenuInflater().inflate(R.menu.animation_canvas_test, menu);
return true;
}
@Override
public boolean onOptionsItemSelected(MenuItem item) {
// Handle action bar item clicks here. The action bar will
// automatically handle clicks on the Home/Up button, so long
// as you specify a parent activity in AndroidManifest.xml.
int id = item.getItemId();
if (id == R.id.action_settings) {
return true;
}
return super.onOptionsItemSelected(item);
}
*/
}
|
import л¬ё мӨ‘ мқјл¶ҖлҠ” нҳ„мһ¬ мӮ¬мҡ©н•ҳм§Җ м•Ҡм§Җл§Ң л„Јм–ҙл‘” кІғлҸ„ мһҲмҠөлӢҲлӢӨ.
м „мІҙ нҒҙлһҳмҠӨ лӘ…мқҖ AnimationCanvasTest мқҙл©°, onCreate л¬ёмқ„ нҶөн•ҙ MyView нҒҙлһҳмҠӨлҘј м—ҙм–ҙм„ң нҷ”л©ҙм—җ к·ёлҰ¬лҠ” л°©мӢқмһ…лӢҲлӢӨ.
MyView м—җлҠ” 비нҠёл§ө(Bitmap)мңјлЎң image1, image2, image3лҘј м„ м–ён–Ҳкі ,
л°°кІҪмғүмқҖ лқјмқҙнҠё к·ёл ҲмқҙмғүмңјлЎң н•ҙм„ң 3к°ң мқҙлҜём§Җмқҳ л°°кІҪмқҙ нҲ¬кіјлҗҳм–ҙ ліҙмқҙлҸ„лЎқ н–ҲмҠөлӢҲлӢӨ.
Resources r = context.getResources();
image1 = BitmapFactory.decodeResource(r, R.drawable.pacman01);
image2 = BitmapFactory.decodeResource(r, R.drawable.pacman02);
image3 = BitmapFactory.decodeResource(r, R.drawable.pacman03);
мң„мқҳ л¬ёмһҘмқ„ нҶөн•ҙ drawable-hdpi нҸҙлҚ”м—җ мһҲлҠ” pacman01-03 нҢҢмқјмқҳ нҸ¬мқён„°лҘј м°ёмЎ°н•©лӢҲлӢӨ.
canvas.drawBitmap(image1, 0, 0, null);
мң„ л¬ёмһҘмқҖ image1мқ„ л¶Ҳлҹ¬мҷҖ 0, 0 мң„м№ҳм—җ к·ёлҰ¬лҠ” л°©мӢқмһ…лӢҲлӢӨ.
int w = image2.getWidth();
int h = image2.getHeight();
//Rect src = new Rect(0, 0, w, h);
Rect dst = new Rect(400, 800, 400 + w / 2, 800 + h / 2);
canvas.drawBitmap(image2, null, dst, null);
мң„ л¬ёмһҘмқҖ image2лҘј л¶Ҳлҹ¬мҷҖм„ң мқҙлҜём§Җмқҳ нҸӯкіј л„“мқҙлҘј кө¬н•ҳкі , нҒ¬кё° л°Ҹ мң„м№ҳлҘј Rect нҳ•нғңлЎң м ҖмһҘн•ҙм„ң canvas.drawBitmap л¬ёмқ„ мқҙмҡ©н•ҙ нҷ”л©ҙм—җ лҝҢл ӨмЈјлҠ” л°©мӢқмһ…лӢҲлӢӨ.
canvas.drawBitmap(image2, null, dst, null); л¬ёмһҘмқ„ canvas.drawBitmap(image2, src, dst, null); лЎң ліҖкІҪн•ҳкІҢ лҗҳл©ҙ src мқҙлҜём§ҖлҘј м§Җмҡ°кі dst мқҙлҜём§ҖлҘј к·ёлҰ°лӢӨлҠ” мқҳлҜёмһ…лӢҲлӢӨ.
super.onDraw(canvas);
3к°ңмқҳ мқҙлҜём§ҖлҘј м„Өм • нӣ„ onDraw л¬ёмһҘмқ„ мқҙмҡ©н•ҙм„ң нҷ”л©ҙм—җ лҝҢл ӨмӨҚлӢҲлӢӨ.
м¶ңмІҳ: http://blueegg.tistory.com/8 [лё”лЈЁм—җк·ё] |


